Installing garage door weather stripping is simple when done right. This guide walks you through the process to protect your home from drafts, bugs, and moisture.
Weatherstripping your garage door might not be exciting, but it’s essential for keeping your space comfortable year-round. Without proper sealing, cold air, water, and pests can sneak inside. This guide will teach you how to install garage door weather stripping using basic tools, affordable materials, and expert-recommended techniques at home.
Whether you’re sealing your garage to cut energy costs or just need peace of mind, weather stripping is a smart investment. For reliable solutions and expert assistance, count on Garage Door Wizard. From step-by-step instructions to full-service support, Garage Door Wizard is your trusted partner for all garage door weatherproofing needs.
Why Garage Door Weather Stripping Matters
If your garage feels drafty or you notice water or bugs sneaking in, worn-out weather stripping is likely to blame. Here’s why installing new stripping is important:
- Energy efficiency: Keeps warm air inside during winter and cool air during summer.
- Pest control: Blocks out rodents, insects, and snakes.
- Moisture prevention: Protects tools, walls, and storage from water damage.
- Noise reduction: Helps insulate from outdoor sounds.
- Improved security: Seals prevent prying eyes and objects from slipping inside.
Types of Garage Door Weather Stripping
Not all weather stripping is the same. Choose the right type for your garage door:
| Type | Best For | Notes |
| Bottom Seal | Cracks under the door | Comes in a U-shape, J-type, or bulb-shape |
| Threshold Seal | Severe water protection | Installed directly on the floor |
| Stop Molding | Gaps around the sides/top of the door frame | Great for wooden doors |
| Brush Seal | Commercial/rolling doors | Durable; great for heavy-duty use |
Pick based on your climate and how much protection you need.
Tools & Materials Needed
Before you start, make sure to gather the following items to ensure a smooth installation:
- New weather stripping (ensure it’s the correct type and length for your garage door)
- Utility knife or scissors (for cutting the weather stripping to size)
- Hammer and nails OR drill and screws (to secure the weather stripping in place)
- Screwdriver (for tightening screws)
- Measuring tape (to measure the correct length of the weather stripping)
- Pencil (for marking measurements on the weather stripping)
- Adhesive (if using a threshold seal for added sealing)
- Clean rag and mild cleaner (for cleaning the garage door frame before installation)
Pro Tip: Always double-check your measurements before cutting the weather stripping. Taking the time to measure twice will ensure a precise fit and avoid wasting materials.
Step-by-Step: How to Install Garage Door Weather Stripping
Step 1: Remove Old Weather Stripping
Gently pry off the old weather stripping using a flathead screwdriver. Carefully remove any nails or screws holding it in place. Discard the old materials and inspect the frame for mold, rust, or pest damage. Address any issues before proceeding with the new installation.
Step 2: Clean the Surface Thoroughly
Before installing new weather stripping, clean the door frame with a mild cleaner or rubbing alcohol. Remove any dirt, oil, or adhesive residue from the surface. A clean frame ensures better adhesion and a more durable seal. Take your time to ensure the surface is fully prepared.
Step 3: Measure and Cut New Stripping
Measure the width and height of your garage door carefully with a tape measure. Add a little extra to the length to allow for trimming. Lay the new weather stripping flat and use a utility knife to cut it to the exact size needed for a perfect fit.
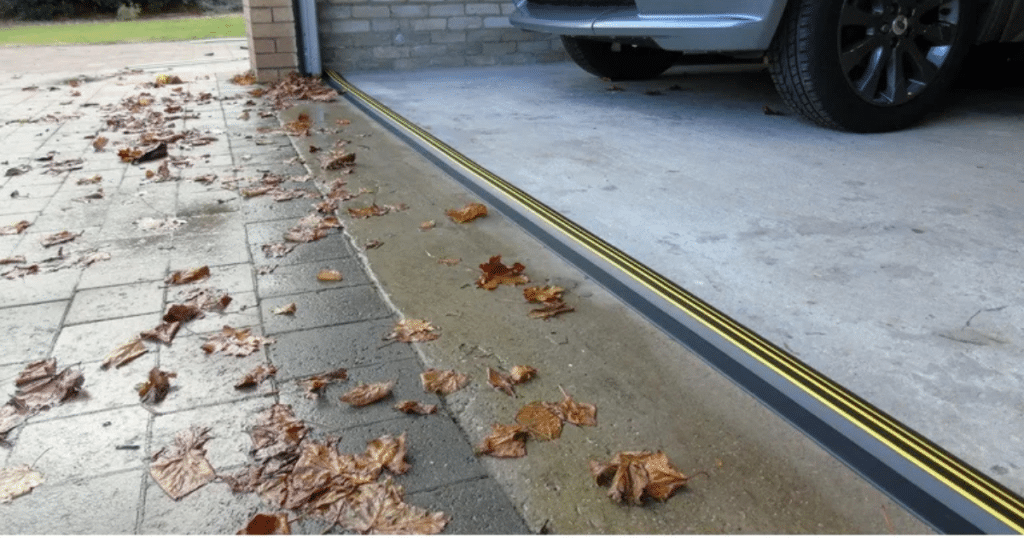
Step 4: Install the Bottom Seal
For track-style bottom seals, simply slide it into the retainer. For nail-on or adhesive-backed seals, align and secure the strip along the bottom edge of the door frame. Start from one end and work your way across, ensuring not to stretch the material too tightly for proper sealing.
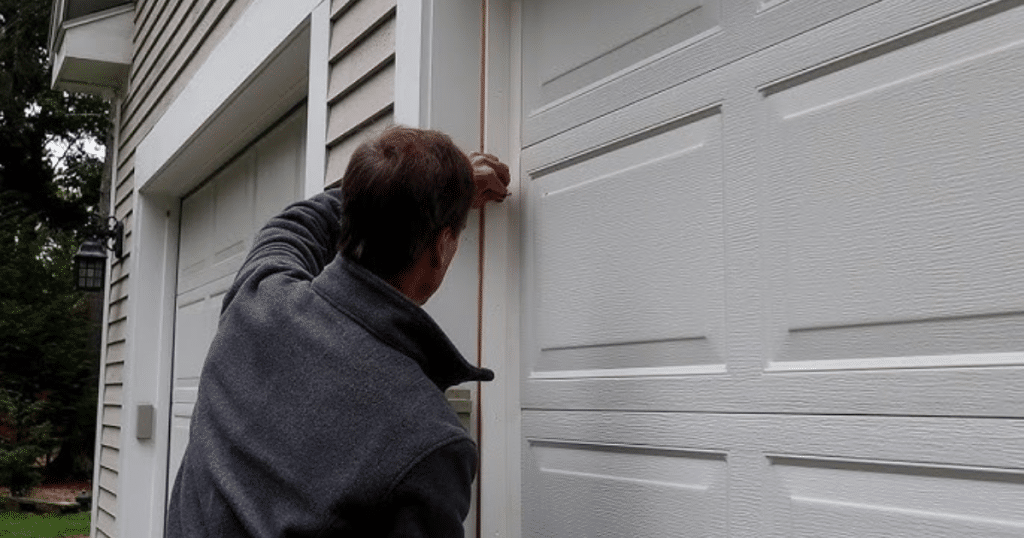
Step 5: Install Top and Side Weather Stripping
Use stop molding to secure the weather stripping along the top and sides of the garage door frame. Align the edge of the stripping with the point where the door contacts the frame. Secure it by nailing or screwing every 12–16 inches for a firm, lasting fit.
Step 6: Optional – Install Threshold Seal
If you experience significant water intrusion, consider installing a threshold seal on the garage floor. Clean the floor surface thoroughly, apply adhesive, and press the seal firmly in place. Let it cure according to the manufacturer’s instructions to ensure a watertight seal for your garage door.
Common Mistakes to Avoid
Here are some common mistakes to avoid when installing garage door weather stripping:
- Stretching the seal too tight: Pulling the seal too tightly can cause it to crack and wear out prematurely, leading to ineffective sealing and unnecessary replacements.
- Using indoor-grade material: Always use weather-resistant materials designed for outdoor use. Indoor-grade materials won’t withstand the harsh weather conditions, reducing the effectiveness of your seal.
- Not testing door movement: After installation, it’s crucial to test the door’s movement. If the seal is misaligned, it can cause the door to jam or not close properly, resulting in potential damage.
- Skipping surface cleaning: Proper surface cleaning before applying adhesive-backed seals is essential. Dirt, grease, and debris can prevent the adhesive from bonding effectively, shortening the lifespan of the seal and compromising its performance.
Avoiding these common mistakes will help ensure that your garage door weather stripping performs well for an extended period.
When to Replace vs. When to Repair
Wondering if your seal just needs a fix? Use this checklist:
| Condition | Repair or Replace? |
| Small gap or crack | Garage Door Repair (patch or seal) |
| Torn or missing sections | Replace |
| Flattened over time | Replace |
| Bugs/water still entering | Upgrade seal type |
Pro Tip: In extreme climates, inspect your seals seasonally.
Maintenance Tips for Long-Lasting Performance
Weatherstripping typically lasts 2-5 years, but regular maintenance can help extend its lifespan. Follow these tips to keep your garage door weather stripping in top condition:
- Inspect seals every 3 months: Regularly check for signs of wear or damage, such as cracks or gaps, and address them promptly.
- Clean with mild soap: After storms or heavy rains, gently clean the weather stripping with mild soap and water to remove dirt and debris, ensuring the seal remains effective.
- Reapply adhesive if necessary: If you notice that the corners of the weather stripping are starting to peel or lose their adhesion, reapply the adhesive to maintain a tight seal.
- Lubricate nearby moving parts: Apply lubricant to the hinges and other moving parts of the garage door to reduce friction and prevent undue stress on the weather stripping.
By following these simple steps, you can maximize the performance and lifespan of your garage door weather stripping.
Frequently Asked Questions
Q1: What type of weather stripping is best for garage doors?
Bottom U-shaped seals are ideal for most homes, providing excellent insulation and protection from drafts and water. For extreme weather conditions or commercial garages, brush or threshold seals are more suitable due to their durability and better sealing capacity. Choose based on your climate and needs.
Q2: Can I install garage door weather stripping myself?
Yes! Installing garage door weather stripping is a simple DIY task. Most installations take less than two hours and require only basic tools like a utility knife, hammer, and measuring tape. This affordable home improvement project can enhance your garage’s insulation and reduce energy costs.
Q3: How often should I replace garage door weather stripping?
Garage door weather stripping should be replaced every 2–5 years. However, it’s essential to inspect it regularly for signs of wear, such as drafts, water leaks, or daylight beneath the door. Prompt replacement can prevent energy loss and further damage to your new garage door and interior.
Q4: What tools do I need to replace weather stripping on a garage door?
To replace weather stripping on a garage door, you’ll need a utility knife, hammer or drill, tape measure, adhesive (optional), and cleaning supplies. These simple tools will help you remove the old stripping, measure the new one, and secure it properly for a tight, energy-efficient seal.
Q5: Does garage door weather stripping help with rodents and bugs?
Yes, garage door weather stripping can effectively block small gaps, preventing rodents and insects from entering your garage. By sealing these openings, you create a barrier that protects your home from unwanted pests, ensuring a cleaner and safer garage environment. This is especially helpful in colder months.
Final Thoughts: Seal the Deal Right the First Time
Installing garage door weather stripping may seem like a small task, but it offers substantial benefits. By choosing the right materials and following our detailed guide, you’ll enhance your garage’s protection against the elements, pests, and energy loss. It’s a simple upgrade that can make a significant difference in maintaining a safe, comfortable space.
Don’t wait for bad weather or unwelcome guests to remind you of the importance of a proper seal. Upgrading your garage door weather stripping today ensures your home stays well-protected. With improved energy efficiency and peace of mind, this easy DIY project is worth the effort, saving you time and money in the long run.
END NOTE
Garage Door Wizard is your trusted partner for all things garage door-related, from installation to maintenance. Whether you’re looking for expert weather stripping installation or a complete garage door upgrade, we’re here to ensure your home stays secure and energy-efficient. Explore our range of services on our website, check out our about us page, or browse our gallery to see our quality work.
For more helpful tips and solutions, visit our blog and stay up-to-date on the latest garage door trends. Have questions? Our FAQs section has answers. If you need expert advice or immediate service, don’t hesitate to contact us. Stay connected with us through Facebook for more updates and offers.