Most homeowners do not think about their garage door remote until it stops working or becomes unreliable. By the time issues appear, the problem may have been developing for some time. Knowing when to replace your garage door remote and how to do it correctly can save you from ongoing frustration, prevent compatibility issues, and help you avoid choosing a replacement that does not meet your system’s requirements.
Homeowners in Cypress, TX often deal with added wear caused by heat, humidity, and daily use, which can shorten the lifespan of remote devices. Having a clear and practical understanding of the replacement process ensures you make the right choice from the start.
Signs It Is Time to Replace Your Garage Door Remote
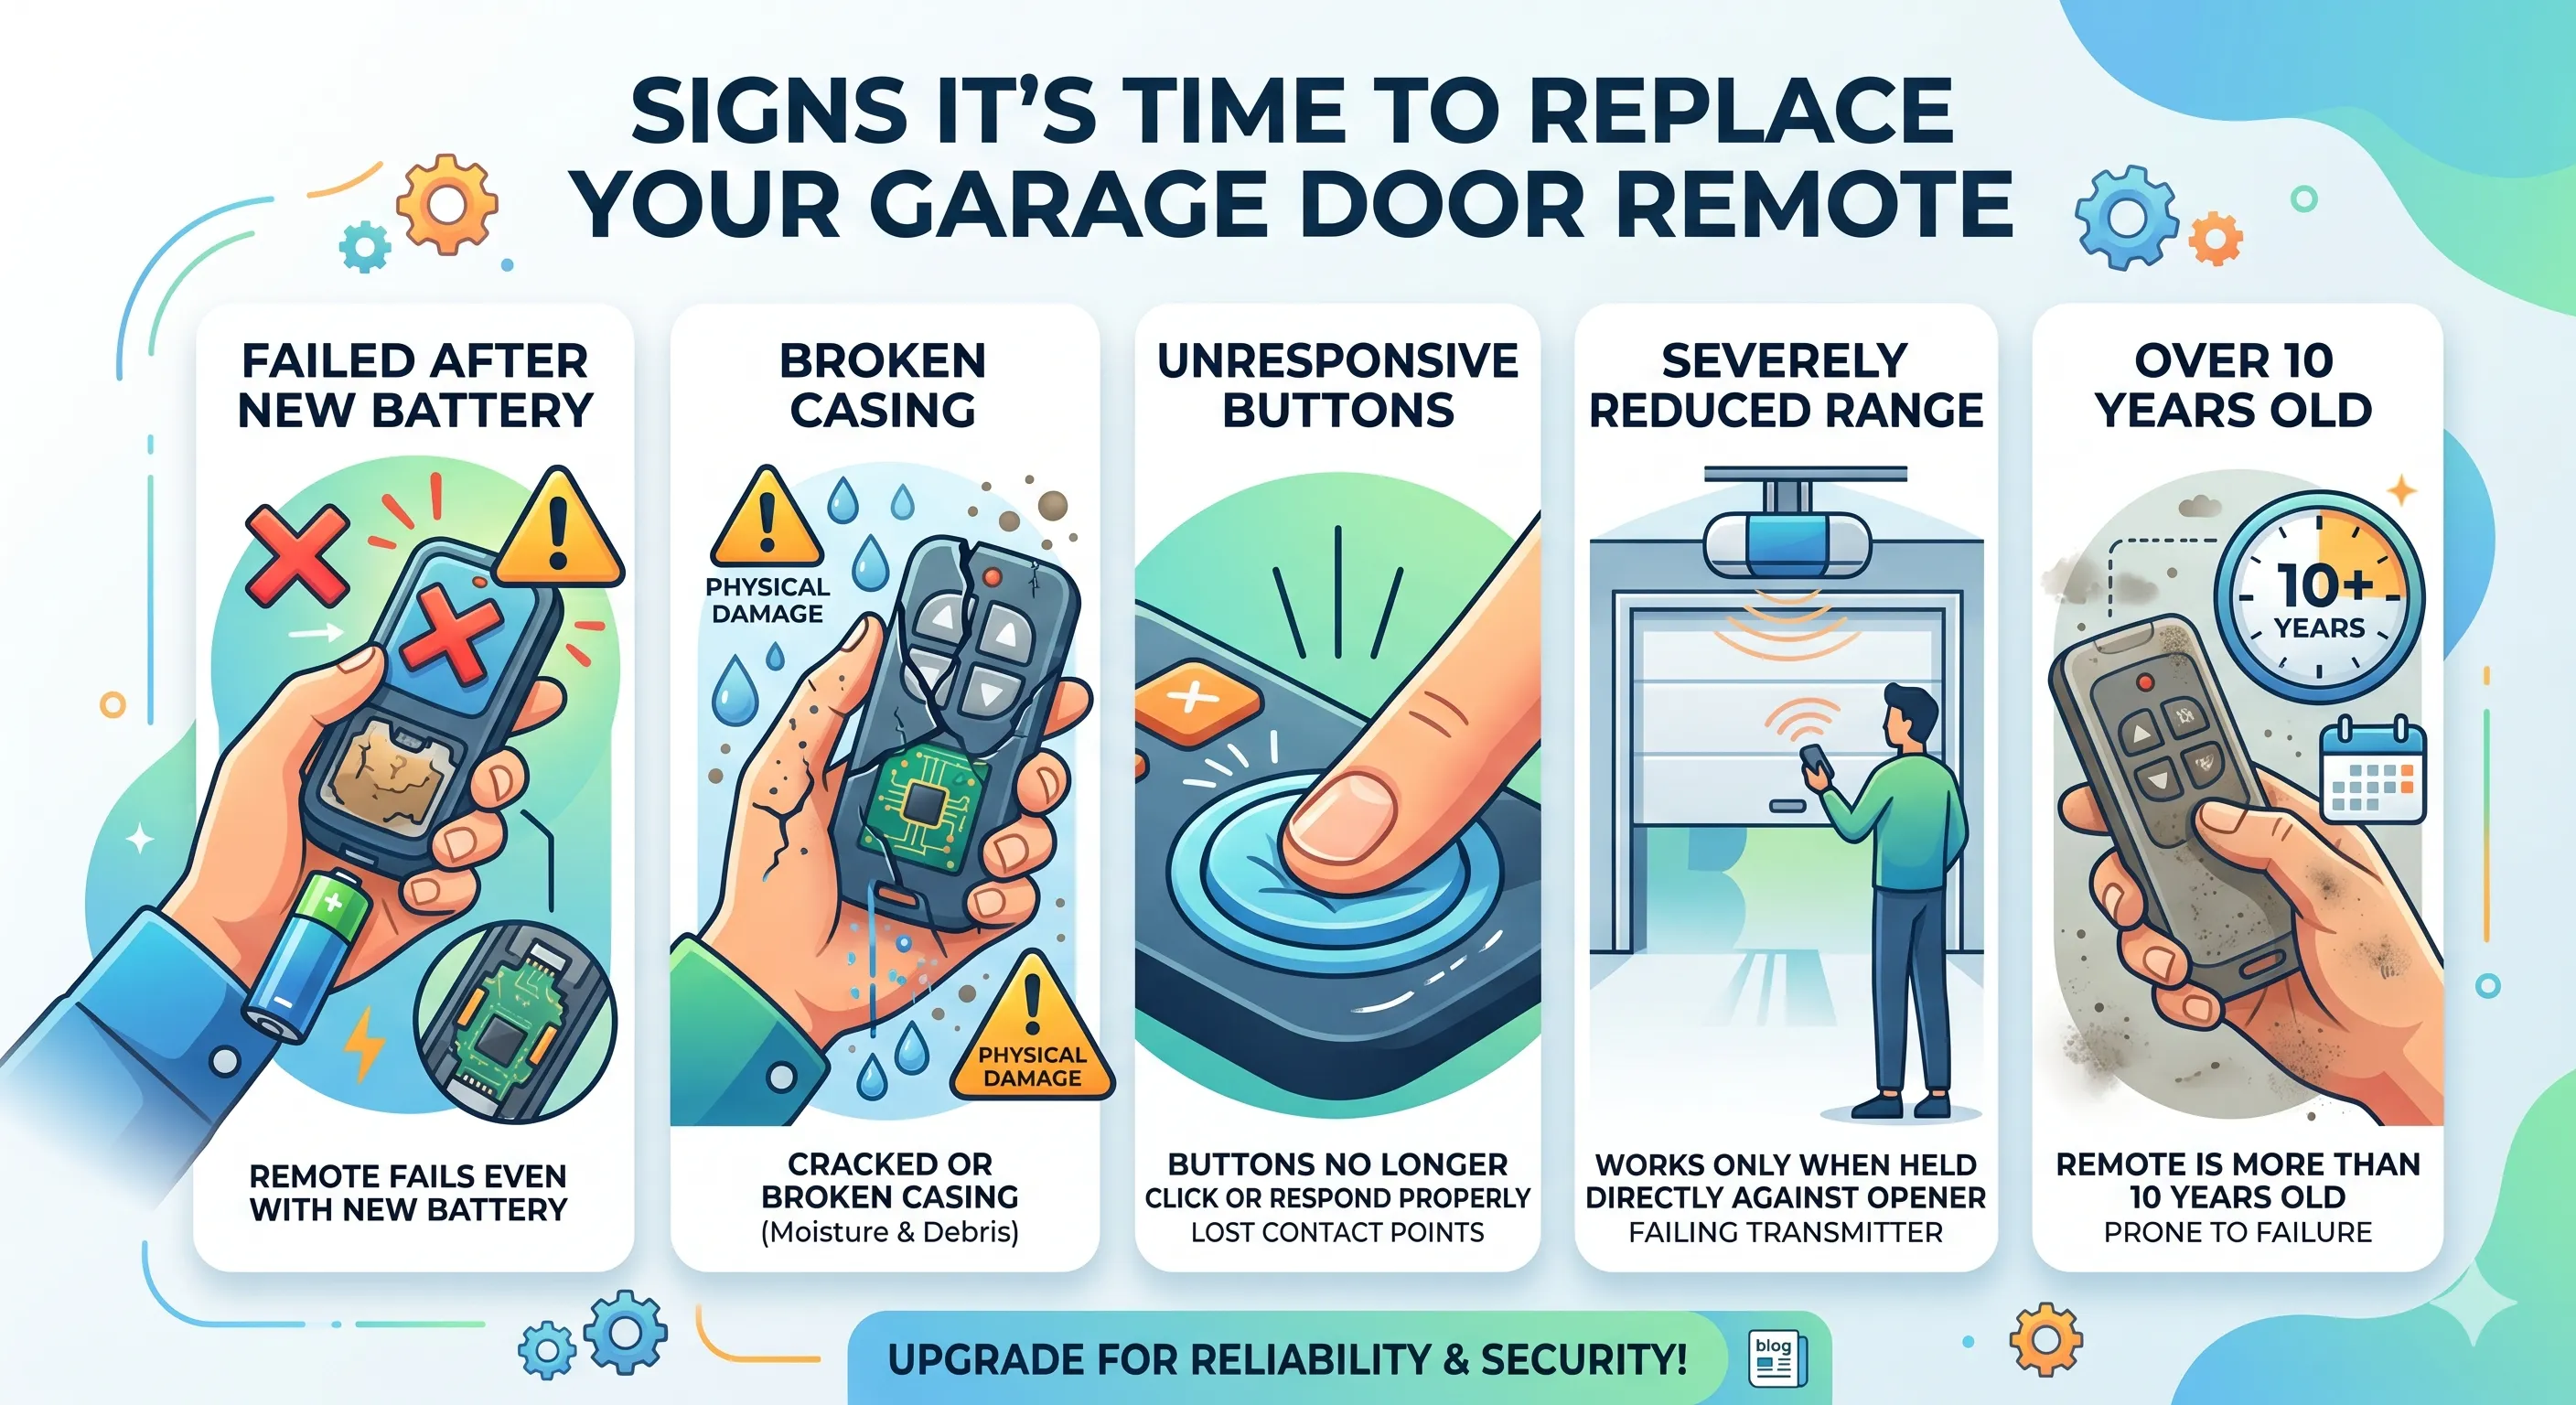
Not every remote problem requires a full replacement. But there are clear signs that tell you when troubleshooting is no longer worth the effort and a new remote is the right call.
Watch for these indicators:
- The remote fails even after a fresh battery: If a new battery does not restore function, the internal components are likely worn out or damaged.
- The casing is cracked or broken: Physical damage to the housing allows moisture and debris to reach the circuit board, causing internal failure that cannot be practically repaired.
- Buttons no longer click or respond properly: Worn-out buttons that feel flat or unresponsive have lost their internal contact points and will not improve over time.
- The remote works only when held directly against the opener: Severely reduced range that does not improve after antenna adjustment usually points to a failing transmitter inside the remote.
- The remote is more than 10 years old: Older remotes are more prone to failure and may no longer be supported with replacement parts or compatible accessories.
If your remote shows one or more of these signs, replacement is the smarter and more cost-effective move. Before buying, review How to Know Which Garage Door Remote to Buy to make sure you select the right replacement for your specific opener.
What to Gather Before You Buy a Replacement Remote
Walking into a store or shopping online without the right information is one of the most common reasons homeowners end up with the wrong remote. A few minutes of preparation make the entire process smoother.
Here is what to collect before you shop:
- Opener brand and model number: Found on the label of the motor unit mounted on your garage ceiling.
- Operating frequency: Listed in the owner’s manual or on the manufacturer’s website using the model number.
- Number of garage doors or access points: This determines whether you need a one-button, two-button, or three-button remote.
- Whether your opener uses rolling code technology: Most openers manufactured after 1993 do. This affects which remotes are compatible.
- Warranty status of your current opener: If it is still under warranty, using a non-approved remote could affect your coverage.
Having these details ready means you can confirm compatibility before purchasing and avoid a return trip to the store.
Choosing Between an OEM Remote and a Universal Remote
Once you know your opener’s specifications, you need to decide between an original equipment manufacturer remote and a universal remote. Both have their place depending on your situation.
OEM Remotes
- Made specifically for your opener’s brand and model
- Offer the most reliable connection and the easiest programming
- Best choice when your opener is newer or still under warranty
- Available through the manufacturer, authorized dealers, and some hardware stores
Universal Remotes
- Designed to work across multiple brands and frequencies
- A practical option when the original remote is discontinued or unavailable
- Require additional programming steps compared to OEM remotes
- Always verify that the universal remote explicitly lists your opener model as compatible
If your opener is a common brand like LiftMaster, Chamberlain, Genie, or Craftsman, an OEM remote is almost always the better choice. Universal remotes are most useful for older or less common systems where original remotes are hard to source.
How to Program Your New Garage Door Remote Step by Step
Programming a garage door remote is a straightforward process on most modern openers. The exact steps vary slightly by brand, but the general process follows the same pattern.
Here is how it works for most systems:
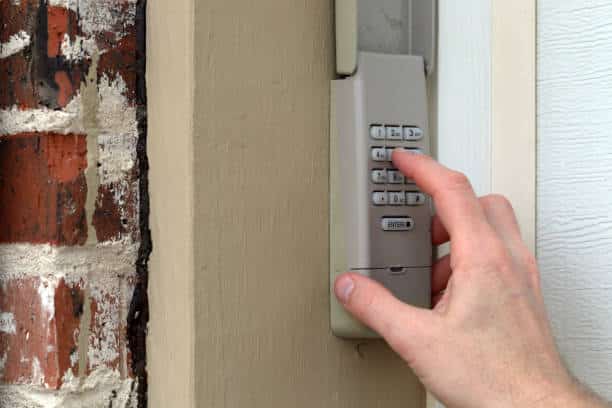
- Step 1: Locate the learn button on your garage door opener motor unit. It is usually on the back or side panel and may be covered by a light cover. The button color varies by brand, such as yellow for LiftMaster and purple for Genie.
- Step 2: Press and release the learn button. A small indicator light will turn on, signaling that the opener is in programming mode. You typically have 30 seconds to complete the next step.
- Step 3: Press and hold the button on your new remote that you want to program. Hold it until the opener’s light flashes or you hear two clicks, which confirms the code has been accepted.
- Step 4: Test the remote from a normal operating distance to confirm it works correctly.
For rolling code systems, this process may include an additional confirmation step. Always refer to the owner’s manual for your specific opener model if the standard steps do not work.
Many garage door remote issues are caused by simple problems like battery failure, signal disruption, or reprogramming needs rather than full device replacement.
What to Do If the Remote Will Not Program
If your new remote does not program on the first attempt, do not panic. There are a few common reasons this happens and straightforward ways to address each one.
- The opener is not in programming mode: Make sure you press and release the learn button, not hold it down. Holding it too long on some models triggers a full memory reset instead of opening the programming window.
- You ran out of time: Most openers give you only 30 seconds after pressing the learn button. If you miss the window, simply start the process again.
- The remote is not compatible: If you have followed the steps correctly multiple times without success, the remote may not be compatible with your opener. Double-check the specifications before trying again.
- The opener’s memory is full: Some openers can only store a limited number of remote codes. Clear one or more old codes from the memory and try again.
- The learn button itself is not working: If the indicator light does not turn on when you press the learn button, the opener may have an internal issue that requires a technician’s assessment.
How to Clear Old Remote Codes From Your Opener
When you replace a remote, it is good practice to clear any old or unused codes from your opener’s memory. This keeps your system secure and frees up memory slots for new devices.
Here is how to do it on most systems:
- Locate the learn button on the motor unit
- Press and hold the learn button for approximately six seconds until the indicator light turns off
- This clears all previously stored remote codes from the opener’s memory
- After clearing, reprogram all remotes and keypads that you still want to use
Keep in mind that this process removes every stored code at once. Make sure you have all your remotes and keypads ready to reprogram before you clear the memory.
Replacing the Remote Versus Replacing the Entire Opener
Sometimes the remote is not the only thing that needs to go. If your opener is aging and showing signs of wear, replacing the remote may only be a short-term solution.
Consider replacing the entire opener if:
- The opener is 15 or more years old
- It makes loud grinding, straining, or rattling noises during operation
- It has required multiple repairs over the past few years
- It uses outdated fixed-code technology with limited remote options
- It lacks modern safety features like auto-reverse and sensor protection
If you are uncertain whether your opener is contributing to the remote’s issues, read Why Your Garage Door Remote Stopped Working, it can help you distinguish between a remote problem and an opener problem before you spend money on either.
Tips for Getting the Most Out of Your New Remote
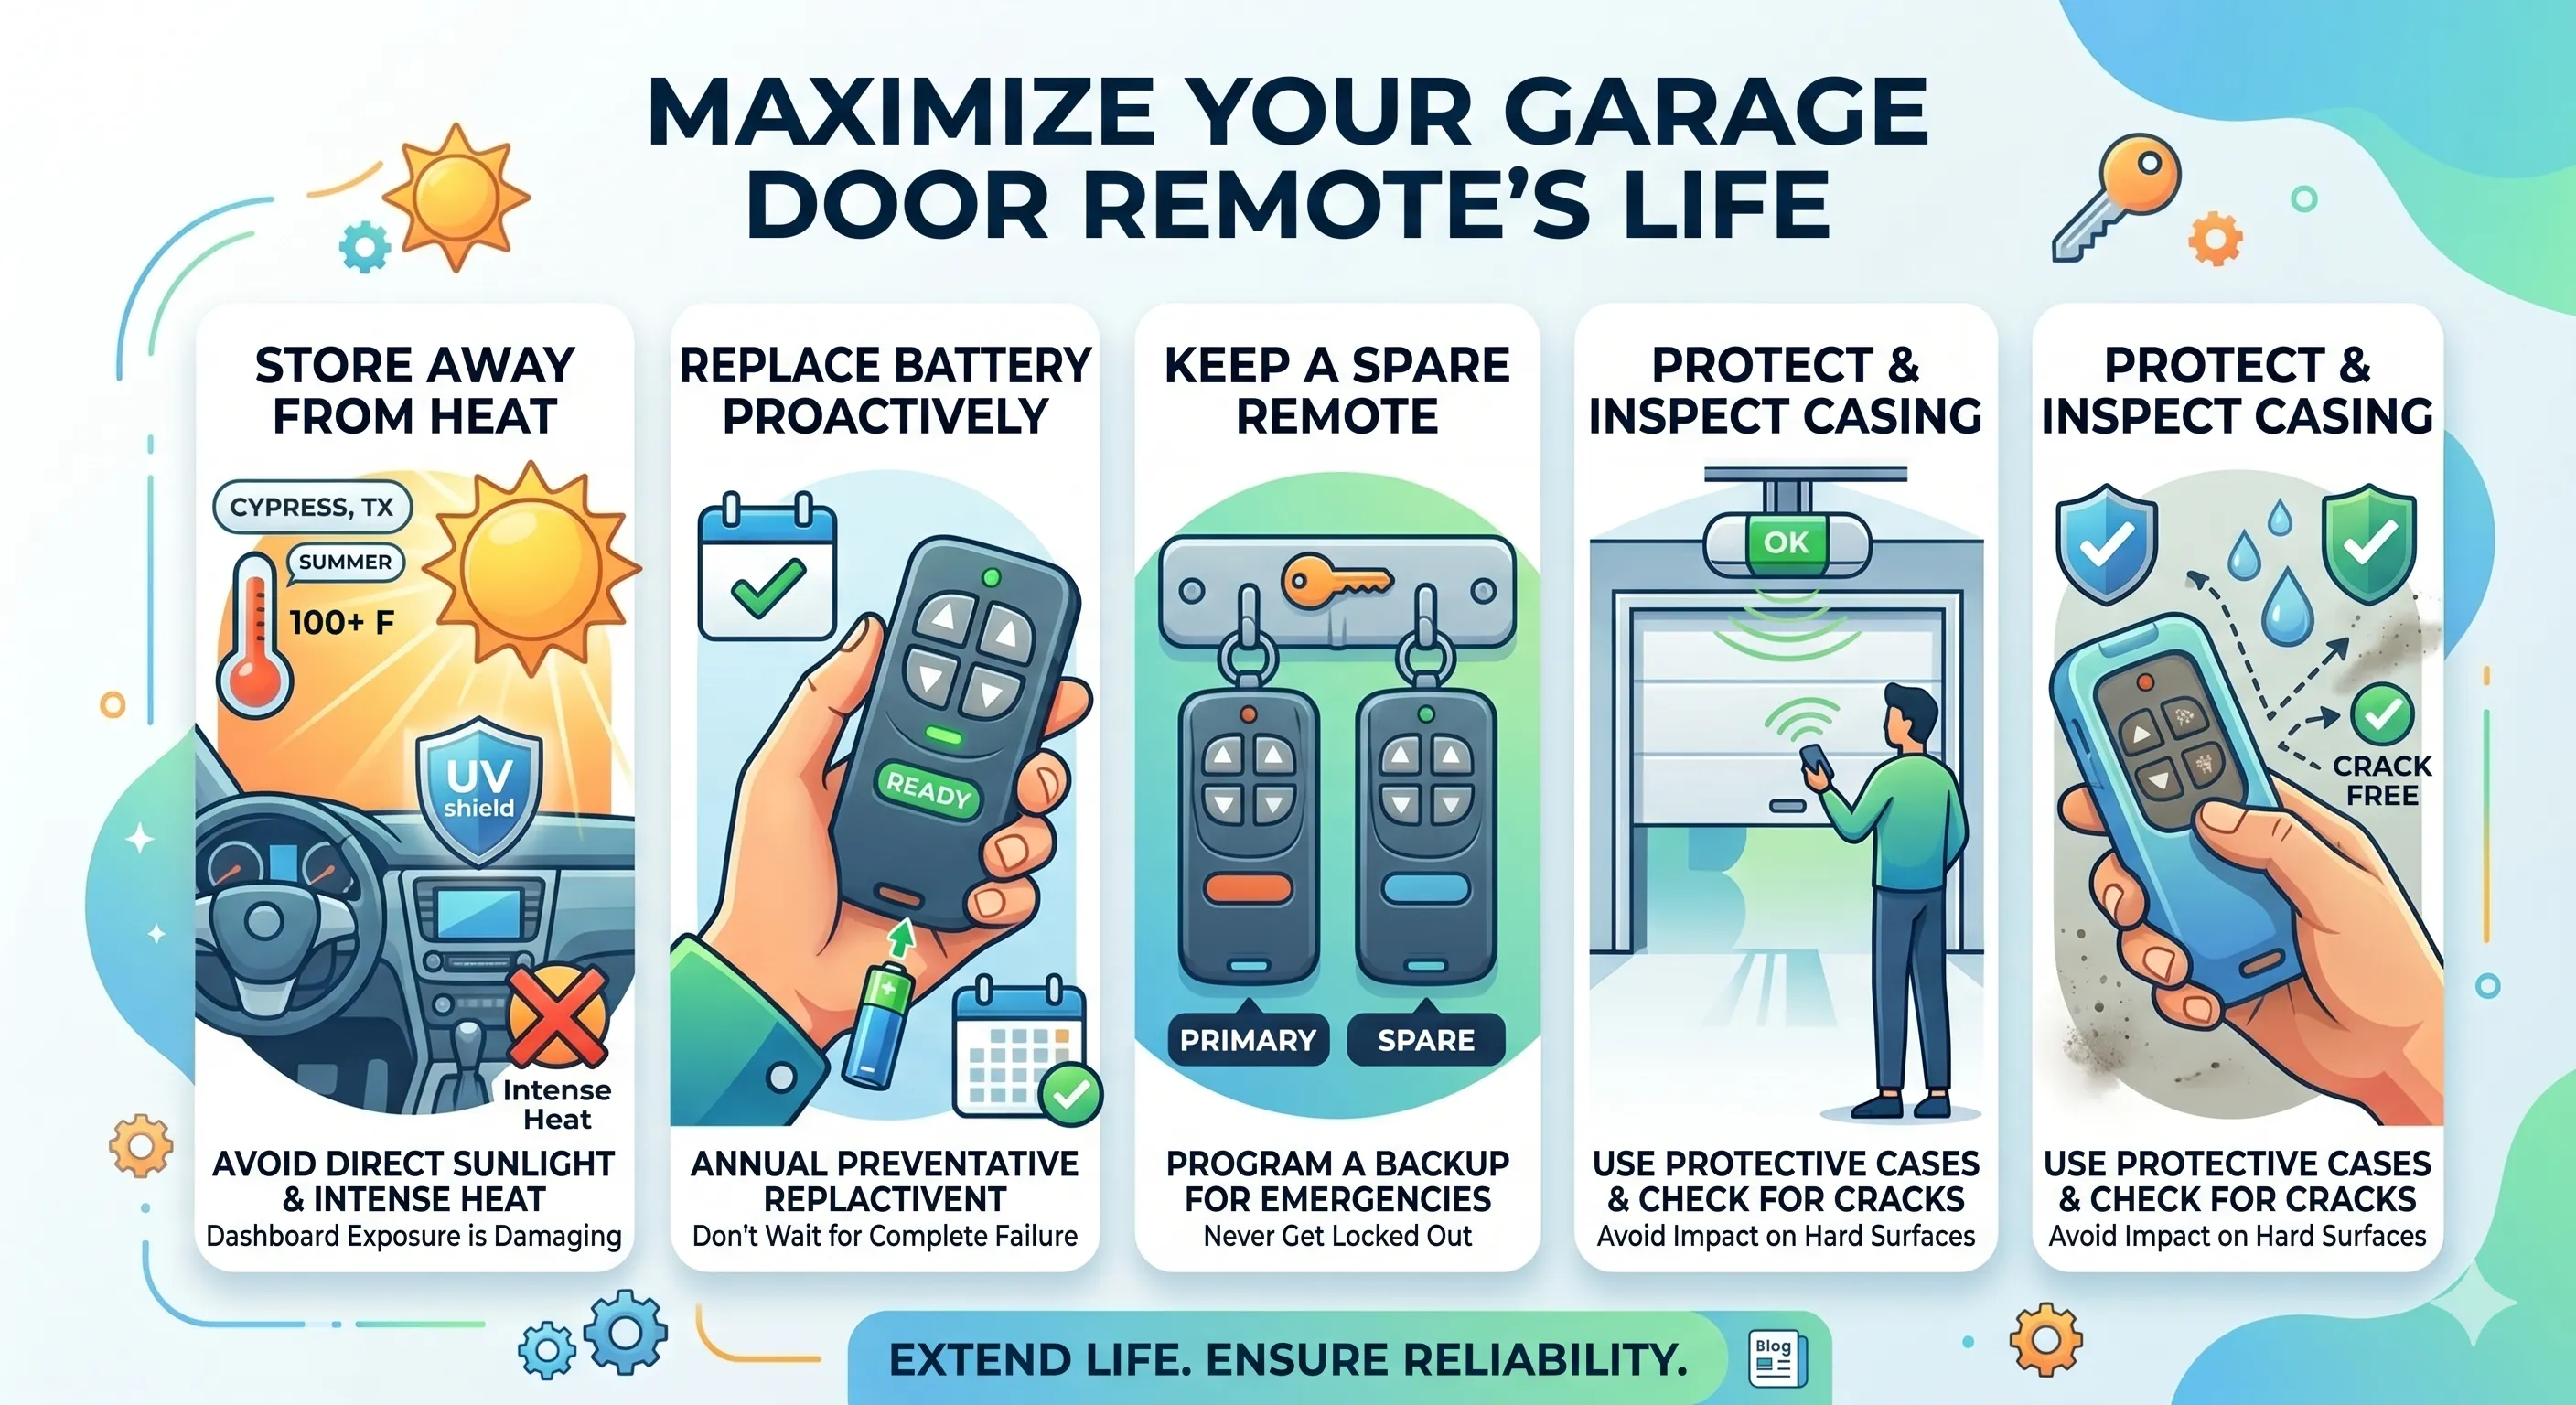
Once your new remote is programmed and working, a few simple habits will help it last as long as possible.
- Store it away from direct heat: Avoid leaving your remote on a car dashboard where it is exposed to intense heat, especially during Cypress, TX summers, where interior car temperatures can reach extreme levels.
- Replace the battery proactively: Do not wait for the remote to fail completely. Replace the battery once a year as a preventive measure.
- Keep a spare remote: Having a backup remote programmed and ready means a dead remote never leaves you locked out of your garage.
- Inspect the casing regularly: Check for cracks or damage that could allow moisture inside, especially after dropping the remote.
- Avoid dropping it on hard surfaces: The internal circuit board is sensitive to impact. A protective case or keychain attachment can reduce the risk of accidental drops.
Regular garage door maintenance such as inspecting moving parts, testing safety features, and keeping components clean helps ensure long-term reliability and can prevent issues that may affect remote performance.
When to Call a Technician Instead of Doing It Yourself
Most garage door remote replacements can be handled as a simple DIY task. However, there are situations where professional garage door repair support becomes the safer and more reliable option.
Call a technician if:
- The opener does not respond to the learn button at all
- The door behaves erratically after programming the new remote
- You suspect the receiver or logic board has been damaged
- The wall button also stops working at the same time as the remote
- You are replacing a remote for a commercial or high-security system
Attempting to diagnose or repair internal opener components without the right knowledge can cause further damage and create safety risks. A trained technician will diagnose the issue accurately and resolve it efficiently. If compatibility concerns are part of the picture, reading What Happens If You Use the Wrong Garage Door Remote will help you understand the risks before proceeding.
A Smooth Replacement Starts With the Right Information
Replacing a garage door remote is one of the simpler maintenance tasks a homeowner can handle, but only when approached with the right preparation. Knowing your opener’s specs, choosing a compatible remote, and following the correct programming steps makes the difference between a five-minute fix and a frustrating afternoon.
If you are in Cypress, TX, and need help replacing your remote, troubleshooting a programming issue, or assessing whether your opener is due for an upgrade, Garage Door Wizard has the expertise to handle it all. Our technicians work with all major brands and will make sure your system is running safely and reliably. Contact us or give us a call today to book your service appointment.